Caribbean Construction Makes Steady Progress
It has been a while since my last entry into the my real estate journal about buying and building on Anguilla. As we've seen, Caribbean construction requires a great deal of planning.
It's all about people, planning, and patience.
Since
starting this tropical building venture in May, we've come a long way.
Actually, since my last Caribbean building entry where I introduced you to
an amazing team of Anguilla builders while showing you
the forming and pouring for the balance of the footings, the team has brought our future home a long way.
I just haven't had the time to update this journal about building in the Caribbean. My main business has been taking up so much of my time that
I've barely had time to breathe, let alone worry about what's happening with our home in Anguilla.
Thank goodness that I hired Mike as project manager, and also to have a team of men who care about
doing quality work. I like every one of them, having gotten to
know them better at a nice dinner at Flavor's during my last visit. And we'll be having a
huge beach Bar-B-Q bash when I next go down, likely end-of-October, with all the families. I can't wait!
When I last left Anguilla (July), my last Anguilla building entry
showed the slab under the cistern was poured, the team was erecting the inside of the cistern forms,
and work was under way at finalizing the formwork for the balance of the footings for the footprint of the house.
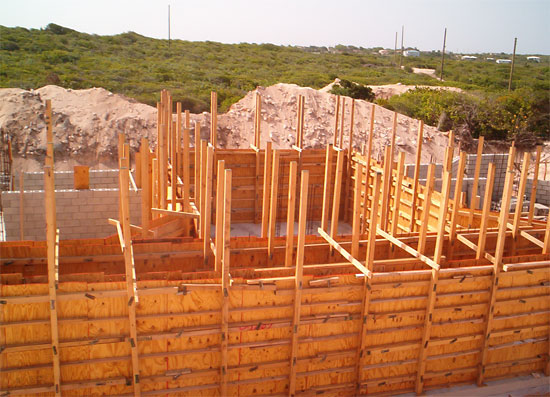
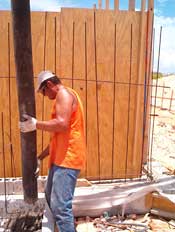
Forming a cistern is no easy task. The amount of concrete that will be poured to the height of almost 8 feet requires excellent carpentry, a lot of bracing (support) and special fasteners that will keep the form together during the pour. These are called snap ties and are invaluable for this type of work.
If you were to take a profile of the cistern wall form, you would see a sandwich. Looking from the outside in (or from the inside out)...
- 4"x4" lumber upright
- horizontally placed lumber 4"x4"
- thick plywood
- the space that will receive the concrete (core). This space contains a grid of 1/2" rebar placed at 8" on center.
- thick plywood
- horizontally placed lumber 4"x4"
- 4"x4" lumber upright
All this is held together with snap ties.
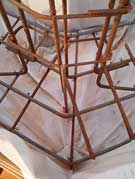
Here's The "Sandwich"
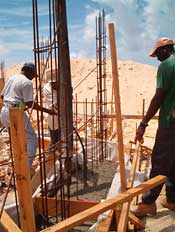
The team ties and secures the steel rebar, completes the formwork
and puts the bracing in place. Next comes careful inspection and
re-verification of all that was done. And that means that...
We Are Ready To Order The Concrete
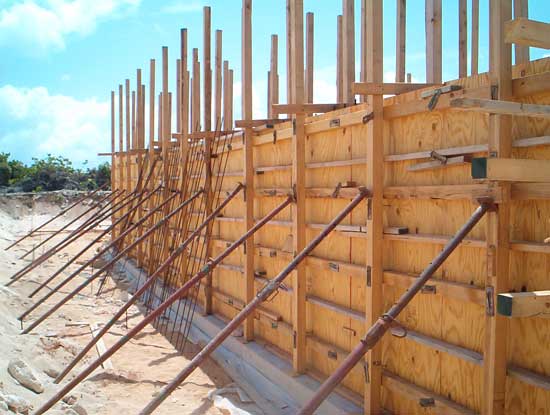
A lot of concrete will be poured. 43 yards! That is 172,000 pounds of wet concrete!
Now you know what I mean when I say that excellent carpentry and a lot of bracing are so important. It all has to hold the weight!
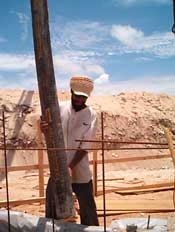
Because the cistern and footings are more spread out on the work site than the cistern base, and the boom of the pump truck can only reach out so far and high, we had to break through the back end of the pit in order for the pump truck to move closer to the pour location...
The Truck Comes Through The Opening
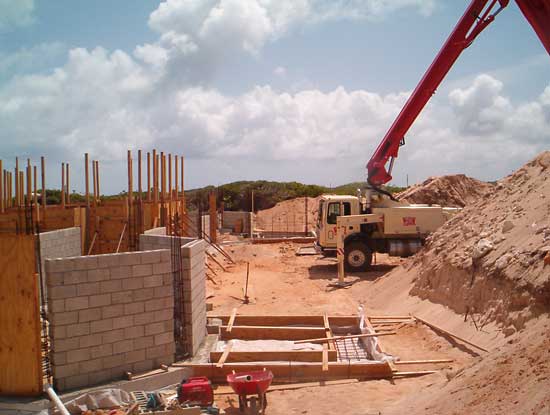
Foresight is necessary. If this had only been realized when the truck was on-site, we'd be
left with hardening concrete on hand and an inability to place it. Instead, the pour is
executed without a hitch and the only next step to perform is to celebrate!
A vibrator for concrete is used to help place and consolidate the concrete, as well as remove any air pockets that form during the pour.
The vibrator sits on the end of long wand. While the concrete is poured into the form, the vibrator is inserted into the placed concrete and vibrated.
The person performing the vibrating should be skilled at that task. Over-vibrating concrete results in segregation between the aggregates (cement, sand, and gravel) leading to a less than optimal concrete strength.
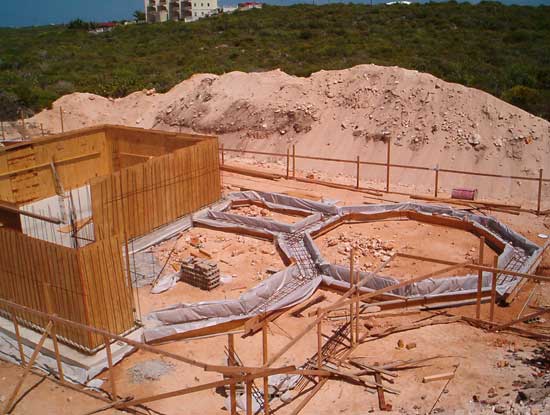
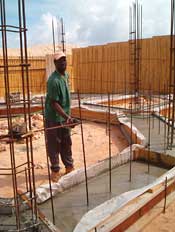
Footings

OK, on to the footings.
Footings are prepared pretty much the same way that the cistern base was done.
The formwork is used to form, contain and level the footings.
To avoid unnecessary and expensive excavation, the team
has stepped the footing up and down to follow the shape of the rock underneath.
This is done in increments of 8" multiples in order to accommodate the height of a concrete block.
Here you see Toby and Curtis carefully measuring and laying the guidelines to form the footings.
Taking your time to get it right at this stage pays dividends for years to come.
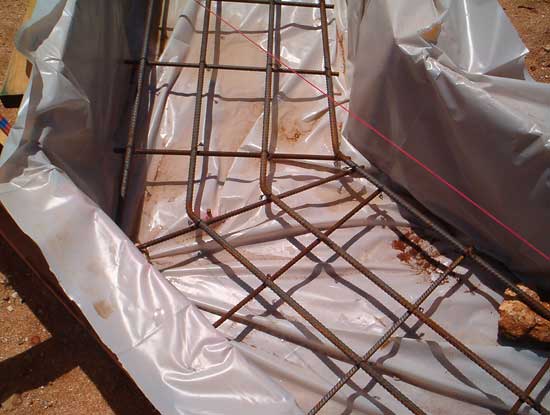
Once again a polyethylene moisture barrier liner is placed inside the form and over the earth to aid in the slow and moist curing process as was discussed in an earlier page. Rebar is then introduced into the formed area for add strength to the footings.
If you know construction, you'll appreciate this detailed photo...
Polyurethane Barrier Inside The Footing Forms
These footings will support the structure. So we don't scrimp on dollar savings here.
Not only did the team follow the engineering recommendations to a tee, but they beefed
up the diameter size of the rebar, as well as the overall thickness of the footing.
A concrete block foundation wall will be placed on top of the footings to bring them up to the desired elevation, to the grade that
has been established. That's why the team has introduced vertical rebar (starters-dowels). This will create a "oneness" between
the footings and walls...
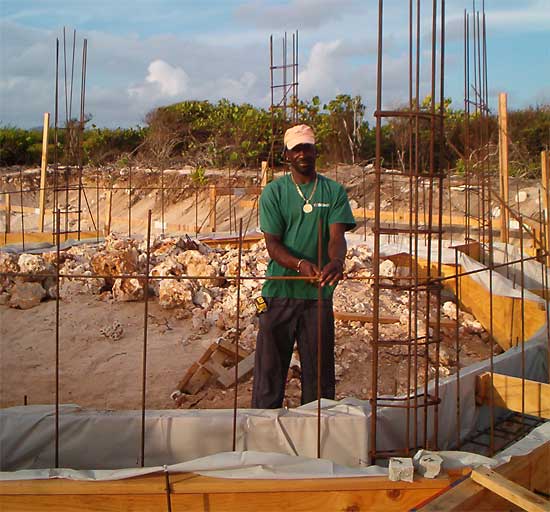
Toby Showing How It's Done!
At this stage we also tie in the column rebar that Calvin Smith has so expertly prepared for us.
Calvin is the team's steel-bender "extraordinaire."
Bending rebar is grueling work at the best of times.
Bending this much rebar (this is just one column!), of the thickness we use for
extra strength, to these various angles, requires real strength and expertise...
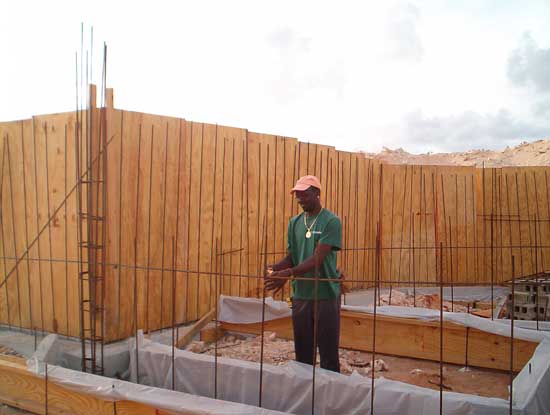
Here's a photo of Toby tying the rebar together. Look at all the rebar and all the columns.
And that's just one small part of the house...
Once the concrete is poured, the starters and the column steel will be solidly embedded in the footings, creating that "oneness."
All is inspected and dimensions are re-verified. Everything is double-checked. Some teams go too fast, but
Mike and the team are obsessive about getting it right. This attention to detail saves a lot of grief later.
OK, we are ready for the pour. The pour is always an exciting time. It marks the end of a phase.
Everyone has to be ready and on their game, because you only get one shot at doing it right. A good
pour delivers a real feeling of accomplishment! And sure enough...
The crew works fast and well. The concrete is placed and leveled in an organized manner. Some photos...
Jim, Jason, Toby
Mike
Jason
As a final touch, the concrete is carefully worked and leveled.
It needs to be watered frequently to assure a nice, slow, cure.
Here you see Toby caring for the concrete as if it was his baby.
In a sense, it is, I guess!
Phew! That's one heck of a lot of progress. I must say I'm amazed at how much
work there is before you actually get to see your home emerging from the ground.
And speaking of babies, this is kind of like an embryo. The first few months
really have to be done perfectly. If we don't get it right at this time...
Weird and unfortunate things happen after "birth."


Facebook Comments
Have your say about what you just read! Leave a comment in the box below.